

How To Set Up Pages In Excel
Lesson 19: Defining Page Setup Options
/en/excelxp/formatting-a-chart/content/
Introduction
By the end of this lesson, you should be able to:
- Gear up page margins
- Change page orientation and paper size
- Create headers and footers
- Create sheet settings
Setting page margins
The page margins ascertain where on the page Excel volition print the worksheet. By default, the peak and lesser margins are fix at i inch in Excel XP, while the left and right margins are fix at 0.75 inch. Margin settings can exist inverse to any yous desire. Different margins can be defined for each worksheet in the workbook.
To change the margins in the Page Setup dialog box:
- Select the correct worksheet.
- Choose File
 Folio Setup from the menu bar.
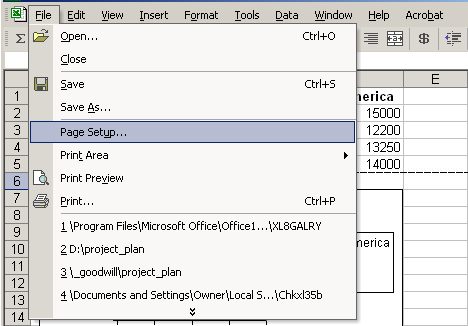
- Select the Margins tab.
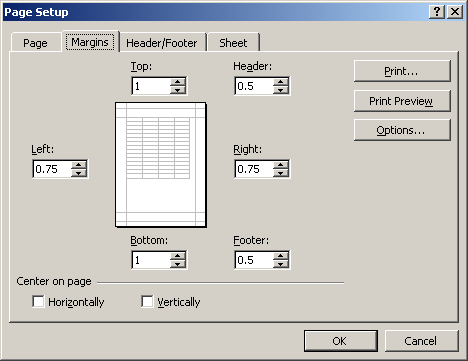
- Utilise the spin box controls to define the settings for each folio margin—top, lesser, left, right, header, and footer.
- Click OK to modify the margin settings.
Irresolute page orientation and paper size
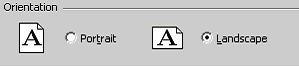
The Page tab of the Page Setup dialog box lets you change page orientation (portrait or landscape) and paper size (e.g., letter size or legal size). The default paper size in Excel XP is 8.5 x 11 inches with a portrait orientation, which prints up and down on the long side of the page. A landscape orientation, on the other hand, prints up and down on the brusque side of the page.
To change page orientation:
- Select the correct worksheet.
- Choose FilePage Setup from the card bar.
- Click the Folio tab.

- Cull an orientation—portrait or landscape—for the worksheet.
- Select a paper size from the list of available newspaper size options that appear in the listing box.
- Click the paper size.
- Click OK to have the page settings.
 The Page tab of the Page Setup dialog box lets y'all shrink the spreadsheet data then it fits on a specified number of pages when y'all print. Click the Fit to: option push, then enter the desired number of pages wide and pages alpine.
The Folio tab of the Page Setup dialog box lets you lot ascertain the resolution of the print task. Impress quality is measured in dpi, or dots per inch. A higher dpi provides a better print quality.
Creating headers and footers
Headers and footers can exist added to whatever worksheet, although they are non required. A header is any information that appears at the top of each page, while a footer prints at the bottom of the folio. If you want a header or footer inserted onto a folio, you'll take to define them. Excel XP defaults to no header and no footer.
To create a header:
- Cull FilePage Setup from the menu bar.
- Select the Header/Footer tab in the Page Setup dialog box.
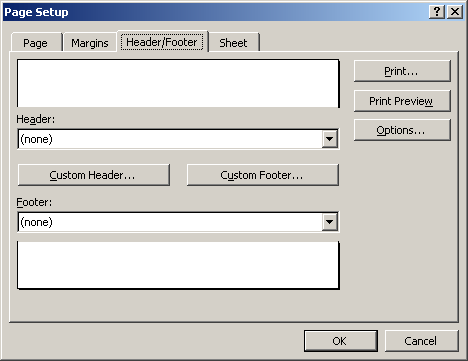
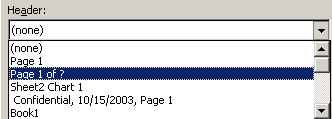
- Click the Header driblet-downward list and select and of the predefined headers.
OR
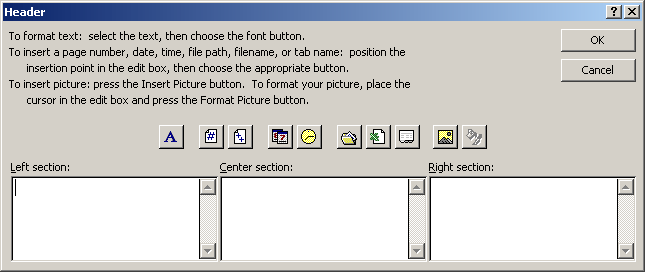
- Click the Custom Header button to create your own header. Follow the instructions in the Header dialog box to make your entry.
- Click OK to render to the Page Setup dialog box.
To create a footer:
- Cull FilePage Setup from the bill of fare bar.
- Select the Header/Footer tab in the Page Setup dialog box.
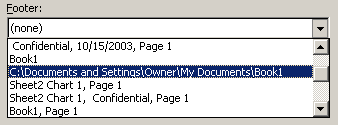
- Click the Footer drop-downwards listing and select one of the predefined footers.
OR
- Click the Custom Footer button to create your own footer. Follow the instructions in the Footer dialog box to brand your entry.
Y'all tin can insert placeholder buttons into both the header and footer to format text and insert page numbers, dates, times, file names, and tab names. Excel replaces these placeholders with the information each represents when the worksheet is printed. Follow the instructions in the header and footer dialog boxes.
Creating canvas settings
The Sheet tab in the Page Setup dialog box provides additional print options yous may want to add to your worksheet.
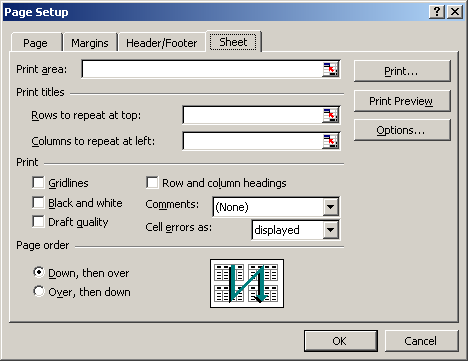
Impress area
By default, Excel prints from A1 to the last occupied cell in a worksheet. You can specify a different range of cells to print.
Print titles
This option prints cavalcade and row labels on each folio of the printout. Specify these rows or columns in the Rows to Echo at Top and Columns to Echo at Left text boxes.
Print: Gridlines
This determines whether gridlines are printed. Nevertheless, turning off gridlines does not bear upon their appearance in Normal view.
Impress: Black and white
If you used colors in your worksheet but don't want to waste the ink in your color printer, use black and white.
Print: Draft quality
Choose draft quality to print the worksheet without gridlines or graphics.
Print: Row and cavalcade headings
Click this option to include row numbers and columns letters in your printed document.
Page order
This determines the social club in which worksheets are printed.
Claiming!
- Create a spreadsheet with whatever information y'all want to include in it.
- Set the page margins to print 0.5-inch from the peak, lesser, left, and right.
- Change the folio orientation to portrait.
- Change the newspaper size to legal.
- Create a header that shows a page number.
- Create a custom footer that shows the engagement in the center section.
- Set print gridlines for the sheet to "yes".
/en/excelxp/print-management/content/

How To Set Up Pages In Excel,
Source: https://edu.gcfglobal.org/en/excelxp/defining-page-setup-options/1/
Posted by: mcleanluelf2001.blogspot.com
0 Response to "How To Set Up Pages In Excel"
Post a Comment